How to Add A Blog Post
Adding A New Blog Post
- Press Page
- For creating a blog post for your "Press" Page, complete the following directions and select "Press" / "News" in the Category Section
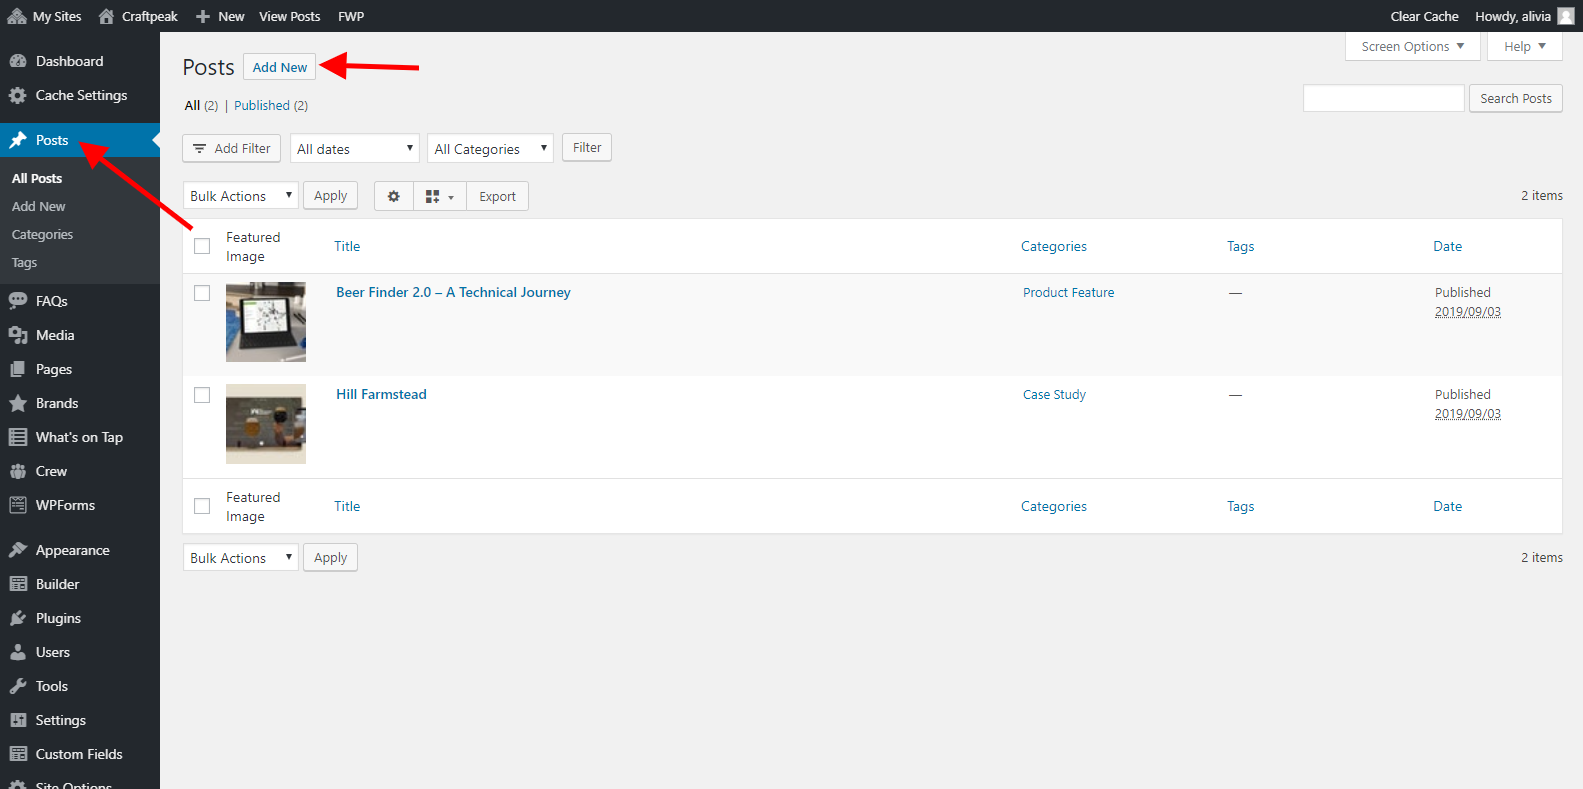
- After logging into your website, select "Posts" from the sidebar. Click the "Add New" button at the top.
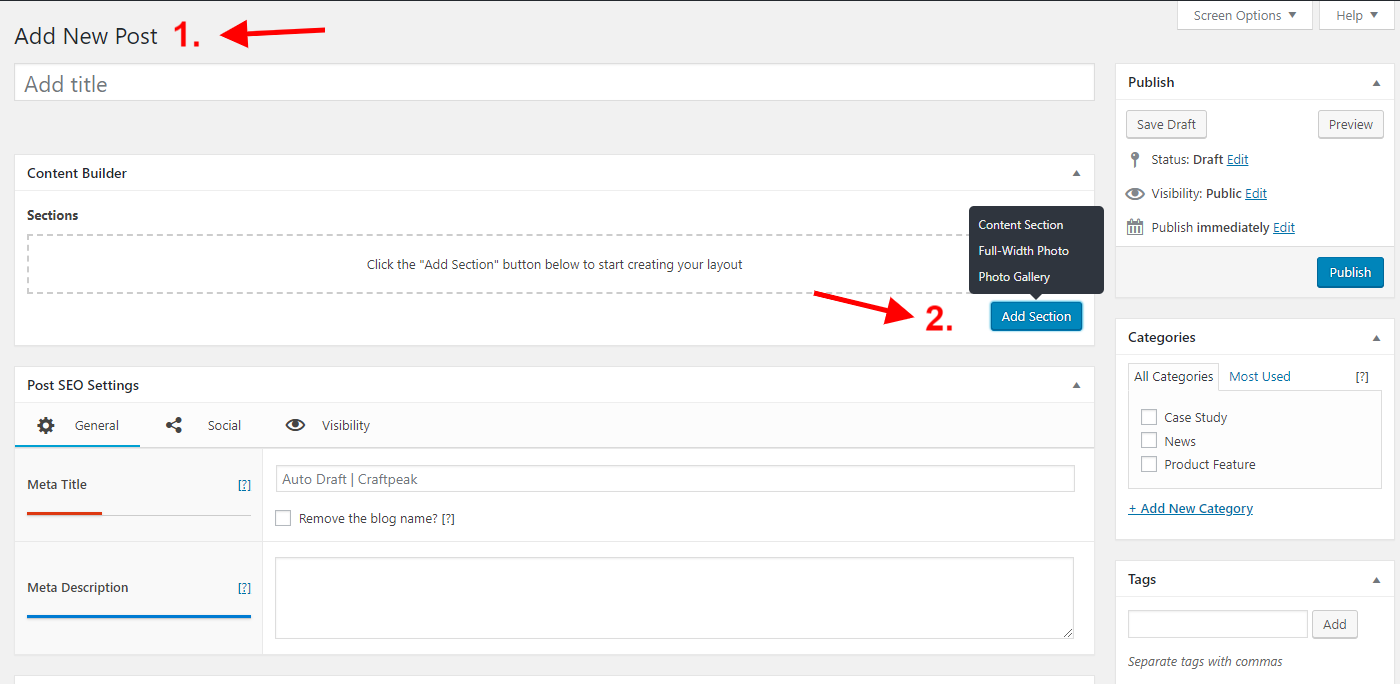
- Add your Post Title
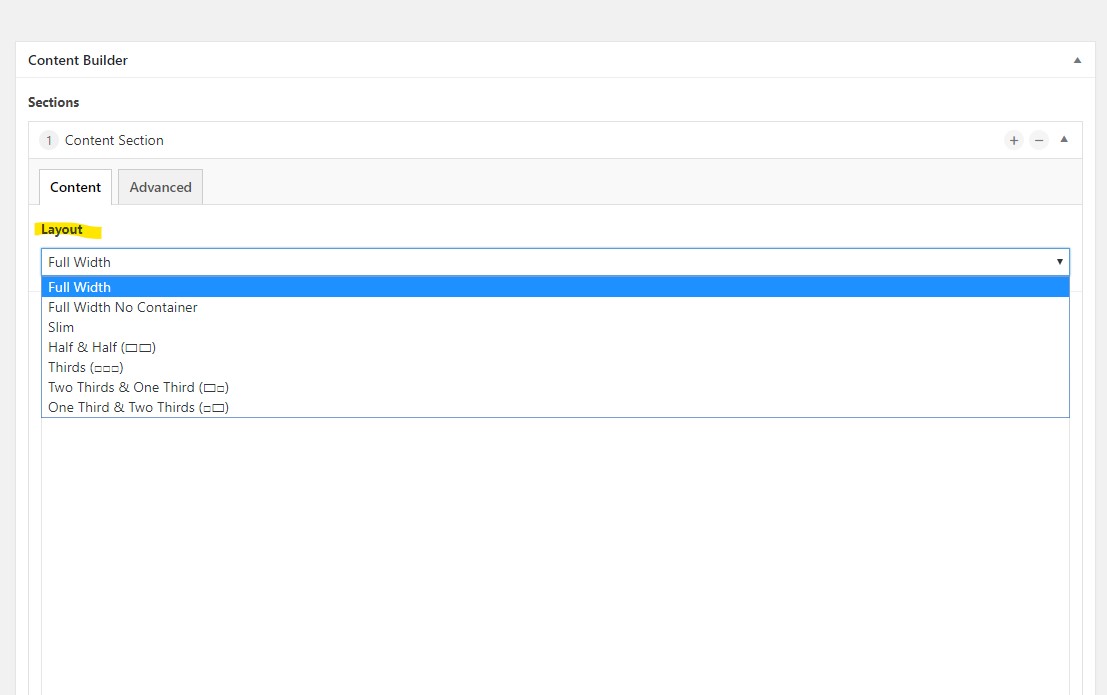
- Select the type of section you want: Content Section, Full-Width Photo or Photo Gallery.
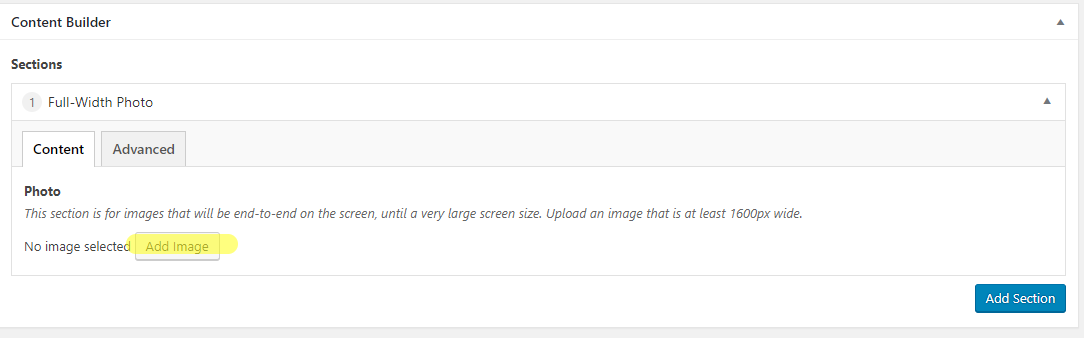
If you choose " Full-Width Photo", select "Add Image" to choose the photo.
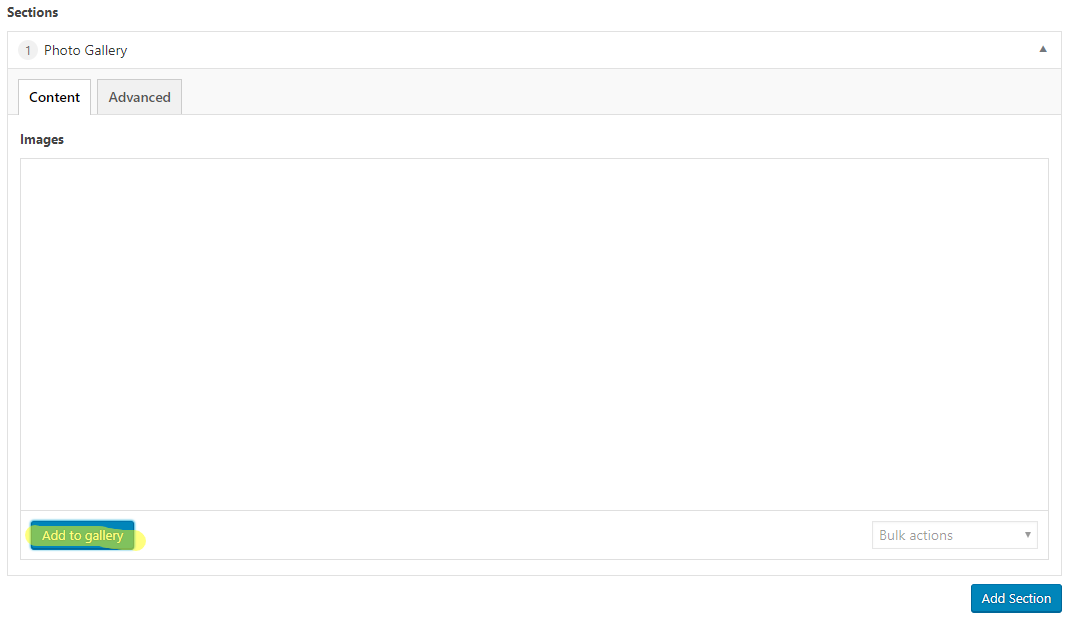
If you choose " Photo Gallery", select "Add to gallery" to select photos. You will be able to select multiple images at one time and can drag to rearrange their order after loaded to the "Image" content area below. You can also delete some or all photos by hovering over one photo and pressing the "X" in the top right corner.
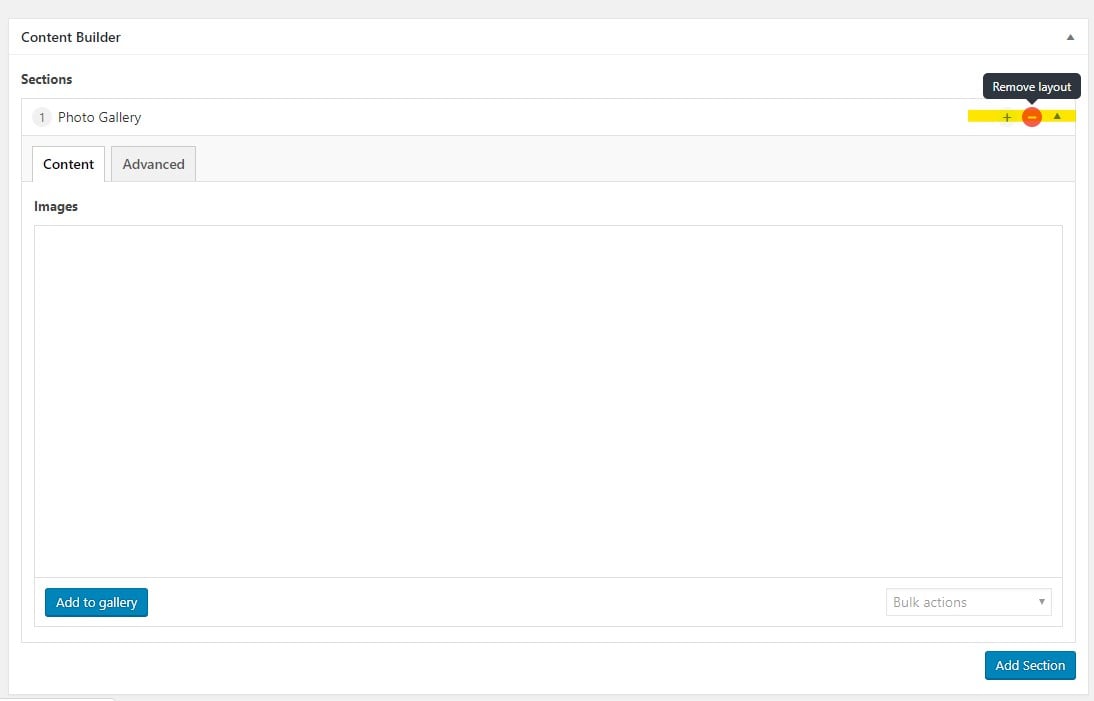
Side note: At any point, if you want to delete a section, just hover over the top right corner and select the red "Remove layout" button.
After adding your section, you can add multiple sections by selecting the blue "Add Section" button.
Categories Section
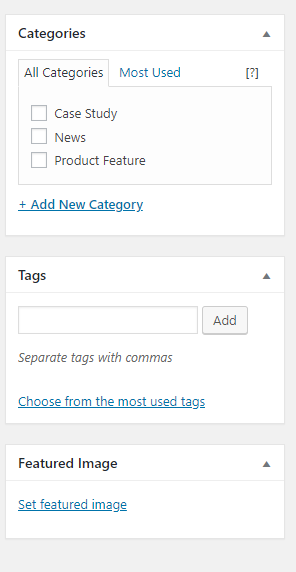
When you're finished with adding sections, on the right side of the page, there is a toolbar for "Categories", "Tags" and the "Featured Image" (the image that will be at the top of your blog post).
- Categories: These are useful for sorting your blog posts or if you have a "Press" or "News" page on your website. For example, if you want to have your blog post be featured on your "Press" page, you will need to make sure to select the correct category so it will appear on that page.
- Tags: This is a way to further sort your blog posts and will show as a list at the end of the post. Your customers can click on a specific tag, for example "saison", and the blog page will show only other posts that have been tagged with "saison".
- Featured Image: Make sure to set a featured image. This will be the large image at the top of your blog post and will also show as the image for the page's tile (on your blog page or press page).
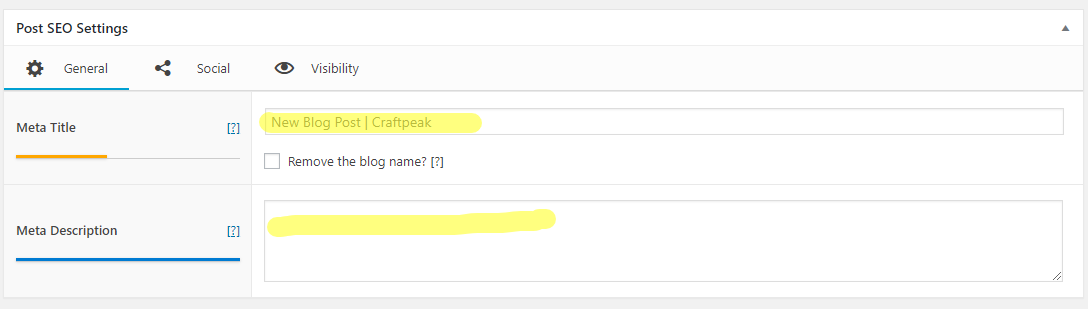
After, you will want to scroll to the bottom of your page, and make sure to edit your post's " SEO Settings". The "Meta Title" is automatically generated based on your blog's title but you can change it if desired. The "Meta Title" bar to the left will change colors based on it's SEO status (try to get a green bar). Under the "Meta Title", is the "Meta Description". Put two or three sentences describing your blog post. Again, the bar under the "Meta Description" will change colors and try to aim for green.
When you have completed everything, press the blue "Publish" button on the top right of the page. It's always a good practice to view your new post to make sure everything looks correctly.