How To Change An Image
There are a few different types of images that can be changed with the Page Builder. After logging into your website, follow these instructions to learn how to change images.
Remember that if you make a mistake while editing content using the Page Builder, you can go to "Done" (the blue button in the top right) and then select "Discard" to erase all the changes you made and start over.
Hero
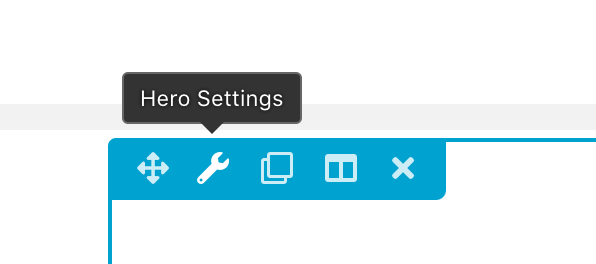
The "Hero" is the main top image on the home page of your website. Find the "Hero Settings" by hovering over the Hero module.
A small window will open with many options for the Hero. Scroll down until you see "Background Settings". There are many options for the Hero image under "Background Type":
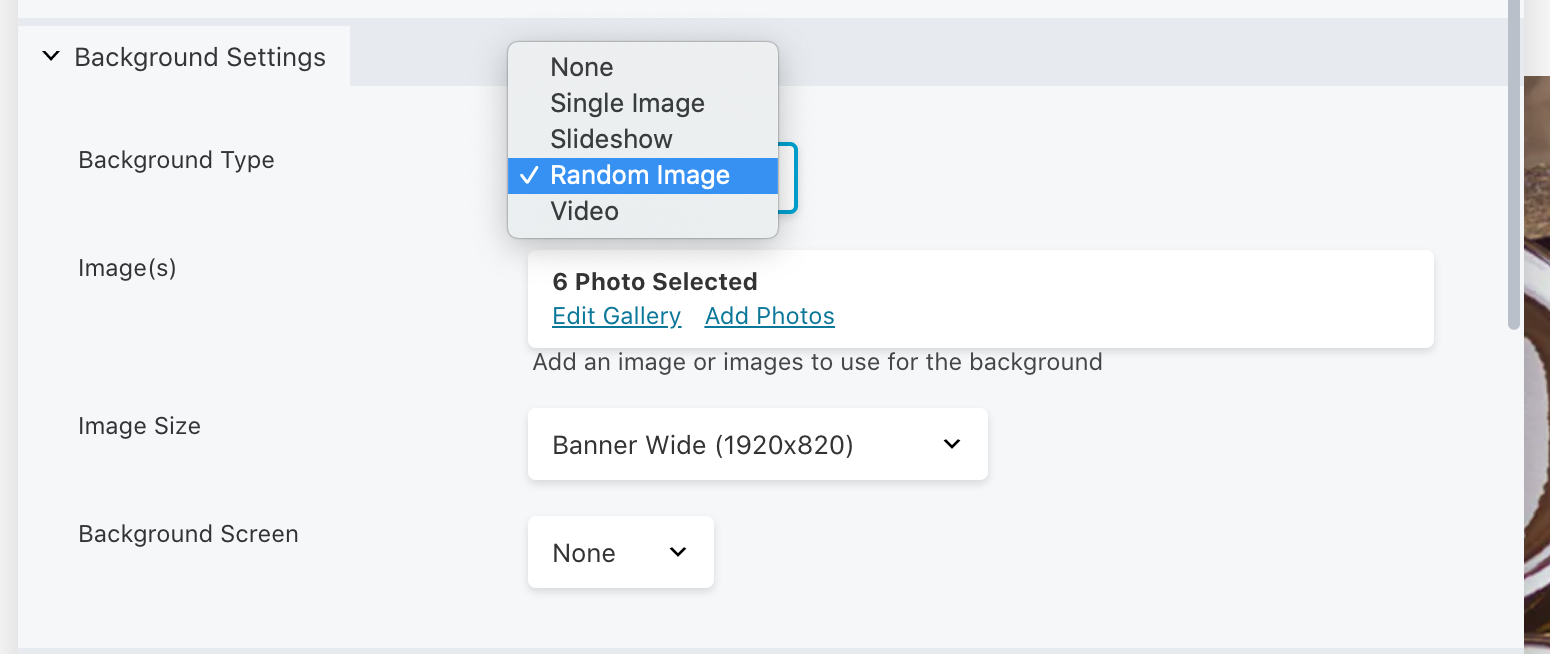
Select the image(s) you want for the Hero by selecting the "Edit Gallery" or "Add Photos" under "Images(s)".
Press "Save" when done, go up to the top right of the page and select the "Done" button and then "Publish". Your changes are now live.
Images on a Page
There are two types of images on a page - a column image and an added photo.
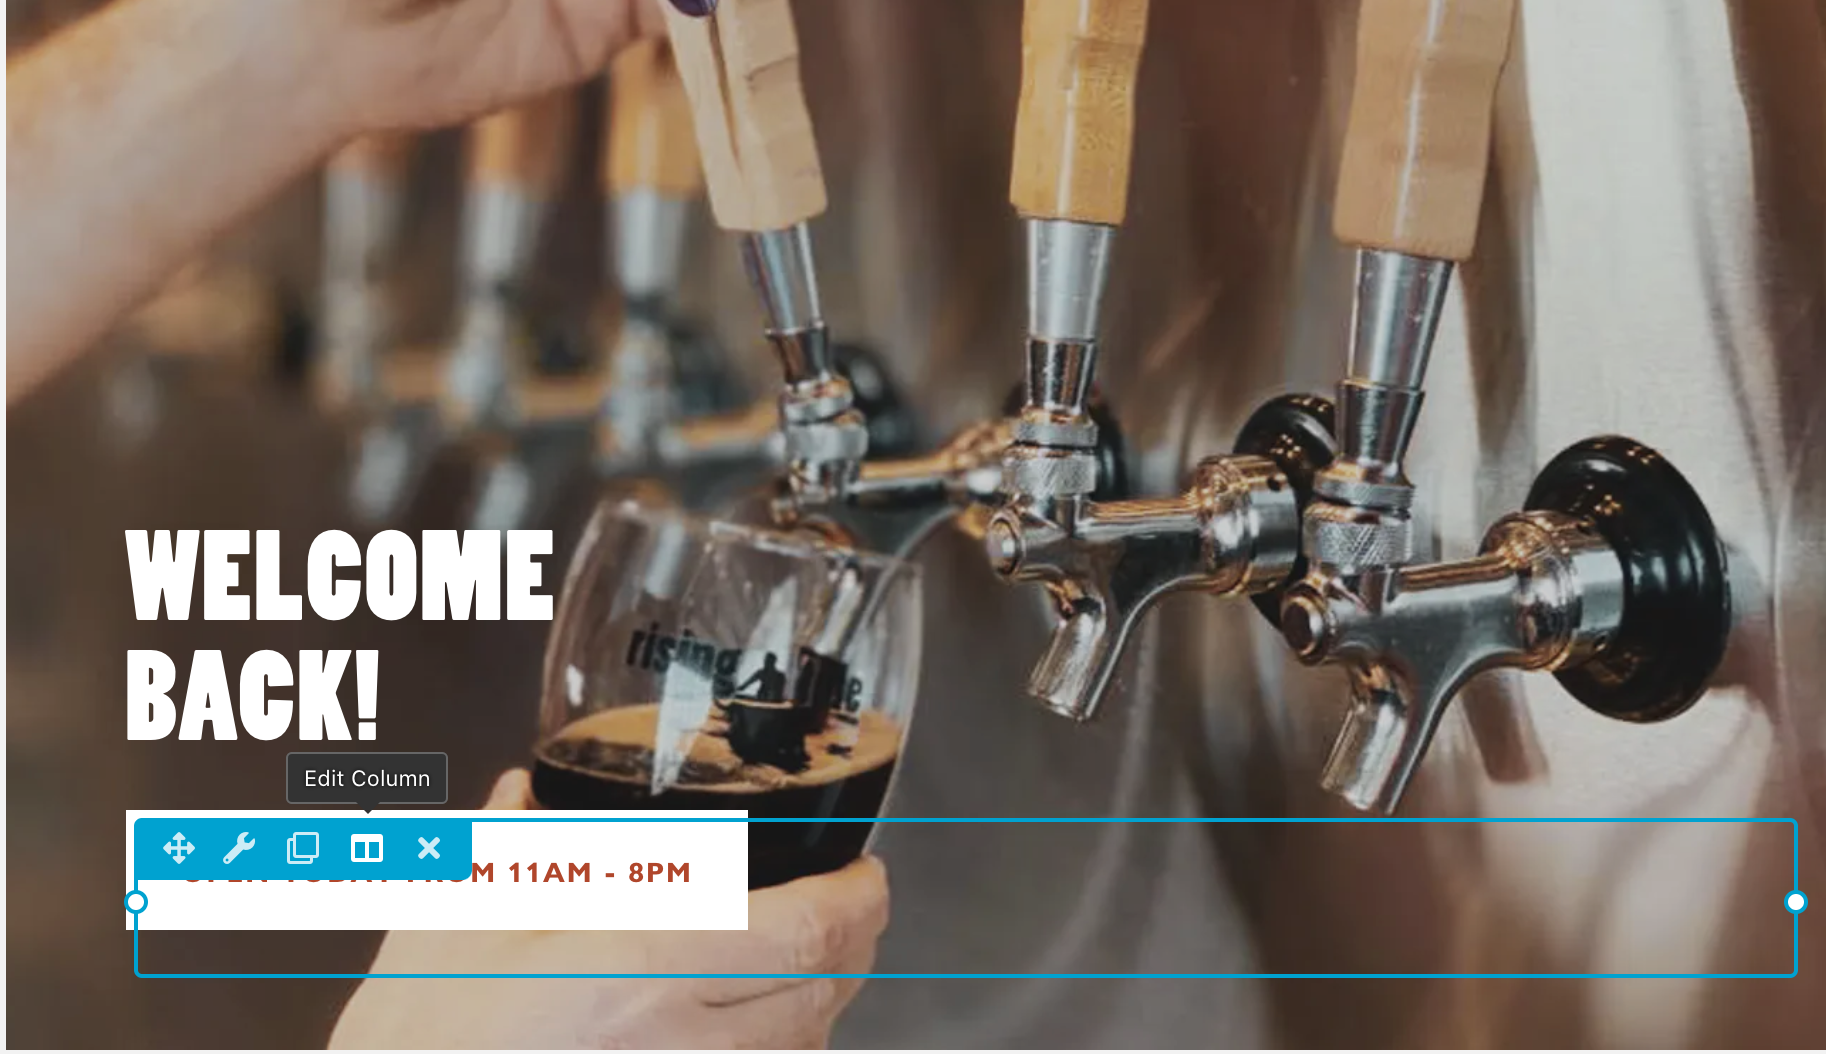
You can tell that the image is part of a column usually by text being over the image.
Column Image
To edit a column image, you'll hover over the text on the image and select "Edit Column":
A small dropdown will appear. Select "Column Settings" and a small window will pop open with the column's settings.
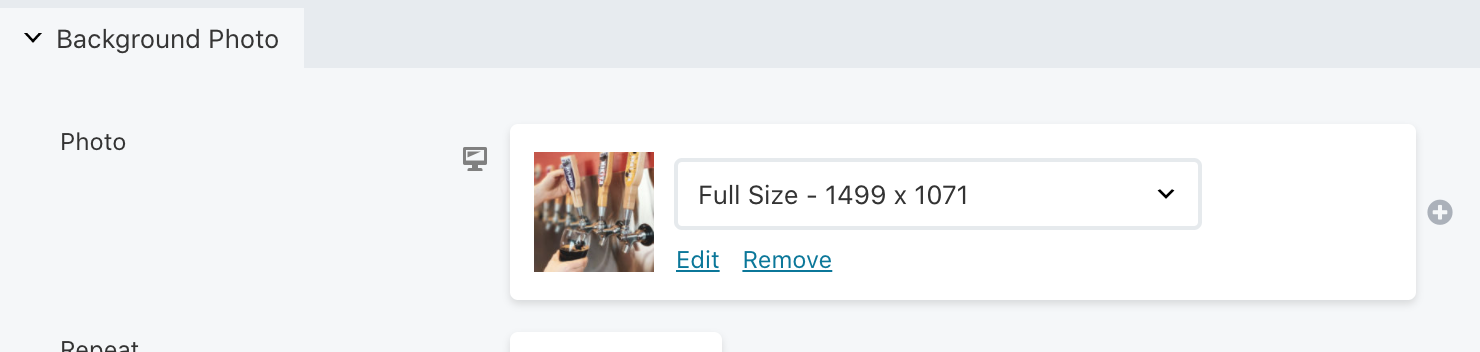
Scroll down to "Background Photo". You will change the image by clicking "Edit" or "Remove"
After changing the image, press "Save", go up to the top right of the page and select the "Done" button and then "Publish". Your changes are now live.
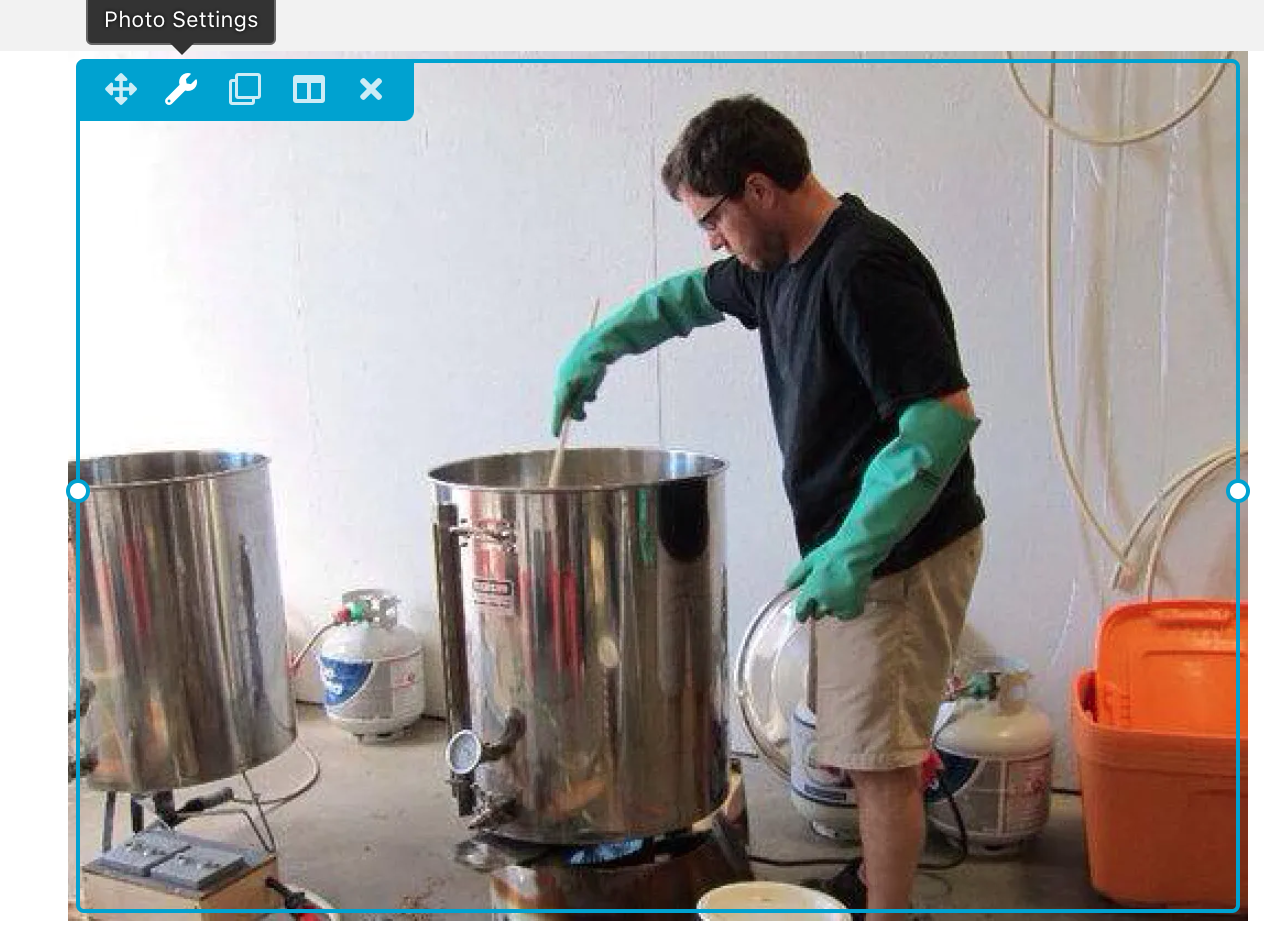
Photo
To edit a photo, you'll hover over the top left of the image you want to change and click the wrench icon "Photo Settings":
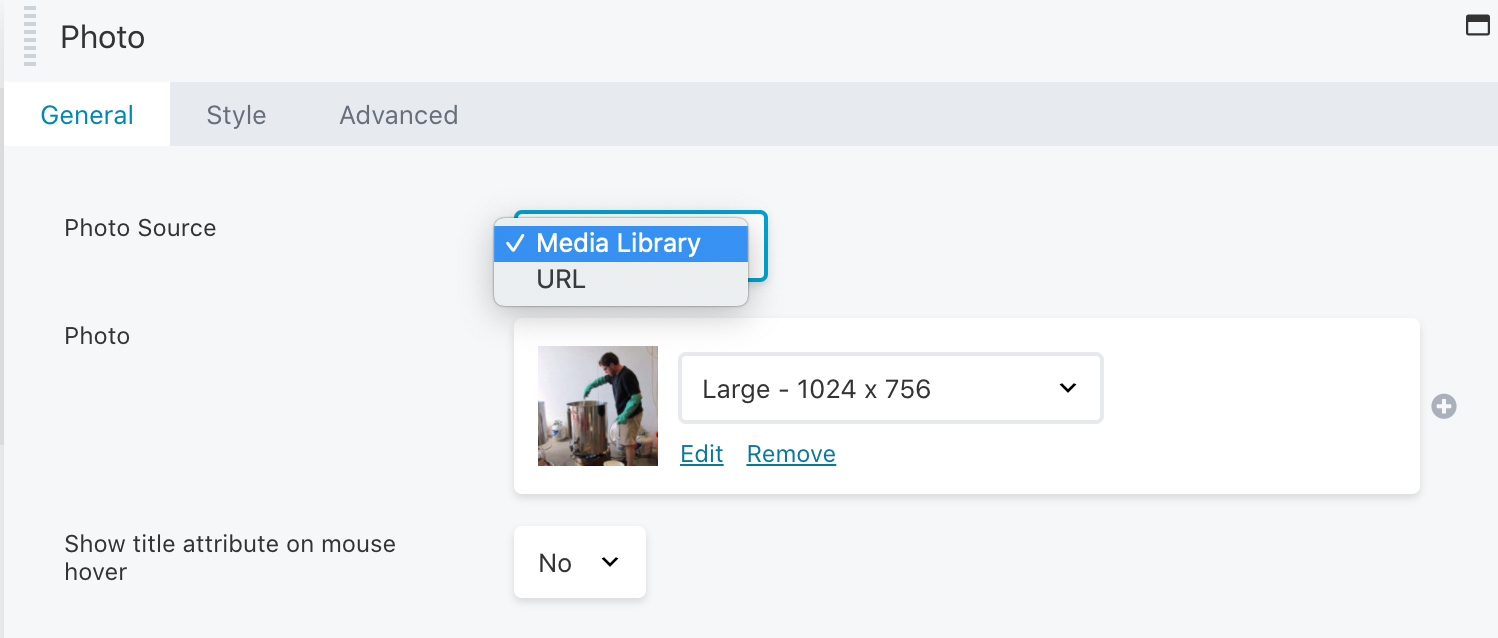
A small window will pop up with the image's settings. You can select an image from your media library or you can use a URL:
After changing the image, press "Save", go up to the top right of the page and select the "Done" button and then "Publish". Your changes are now live.
Related Articles
How To Customize Your Header For Arryved Online
What Is The Online Store Custom Header? The Custom Header allows you to add your logo and a banner-style background image to lay across the top of the pages of OpenTab and your Arryved Online Store. The images are added and customized in your Online ...How To Create Unit Sizes
What Are Unit Sizes? Unit Sizes are how different sizes and prices can be applied to an Inventory Item. In your Arryved Portal, you will create all your possible Unit Sizes and add the applicable sizes to each of your Inventory Items with an ...Display Information Overview
What Is Display Information? When creating inventory in your Arryved Portal, you can add a description and image to each item. This display information is shown in Arryved Service to help keep your staff educated on the menu items. It also appears in ...Metorik: Change A Subscription Address
If a customer with a subscription needs to change their address, please follow the instructions below. 1. First have your customer update the address in their account. You can send them a link to this tutorial with instructions on how to change their ...How To Change Employee Email Addresses
What Are Admin Email Addresses? Arryved Portal Admins are employees who have access to your Arryved Portal. They log into the Portal using their email address. If an Admin needs to use a different email address, you can update it on their employee ...