How To Configure Epson KDS Devices
What Are KDS Devices?
A KDS device refers to any printers or Expansion Modules used for your Kitchen Display System. This article will teach you how to configure your KDS devices in the Configuration Utility on your Windows PC. Please note that if purchased through Arryved, your KDS will come configured already, in which case, this procedure is only necessary if you want to make changes.
Prerequisites
- You have begun with the KDS Setup Guide.
- You completed Step 1 and decided on Single Screen or Multi-screen setup.
- You completed Step 2, reviewed the Hardware Checklist, and received your hardware.
- You completed Step 3 and set up your hardware with the KDS Hardware Setup (Single Screen) or Hardware Setup (Multi-screen).
- You completed Step 1 of the configuration process, Install The KDS Configuration Utility onto your PC.
Limitations
Must have a PC Windows 7 or higher. Mac not supported.
Configuring Your KDS Devices
Open the Configuration Utility on your PC (if it isn’t already open).
Login using admin as the username and no password.
Click on the Devices tab at the top of the screen.
Click the + button on the left side to add a new device or click on an existing device to make changes.
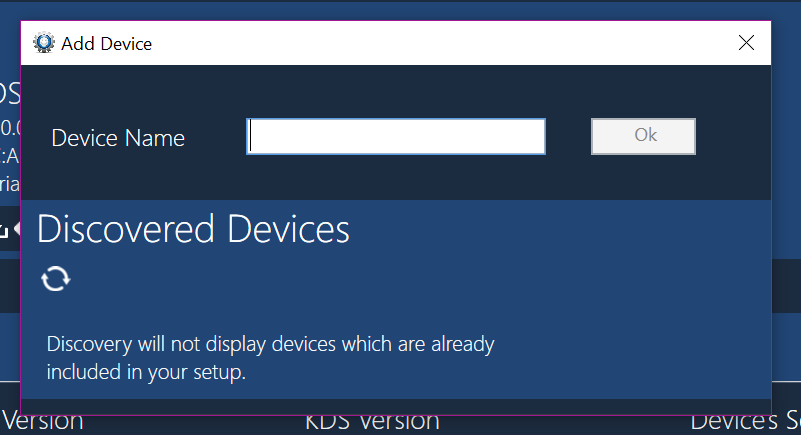
If you are adding a new device, make sure the device is on and connected to the same network as the PC you are using.
Wait for the device to appear under Discovered Devices, give it a name, and click OK.
Under Device Configuration, click Configuration to drop down the information.
Use the guidelines below to enter or change the information in the Devices tab.
Repeat this process for each printer and Expansion Module in your KDS.
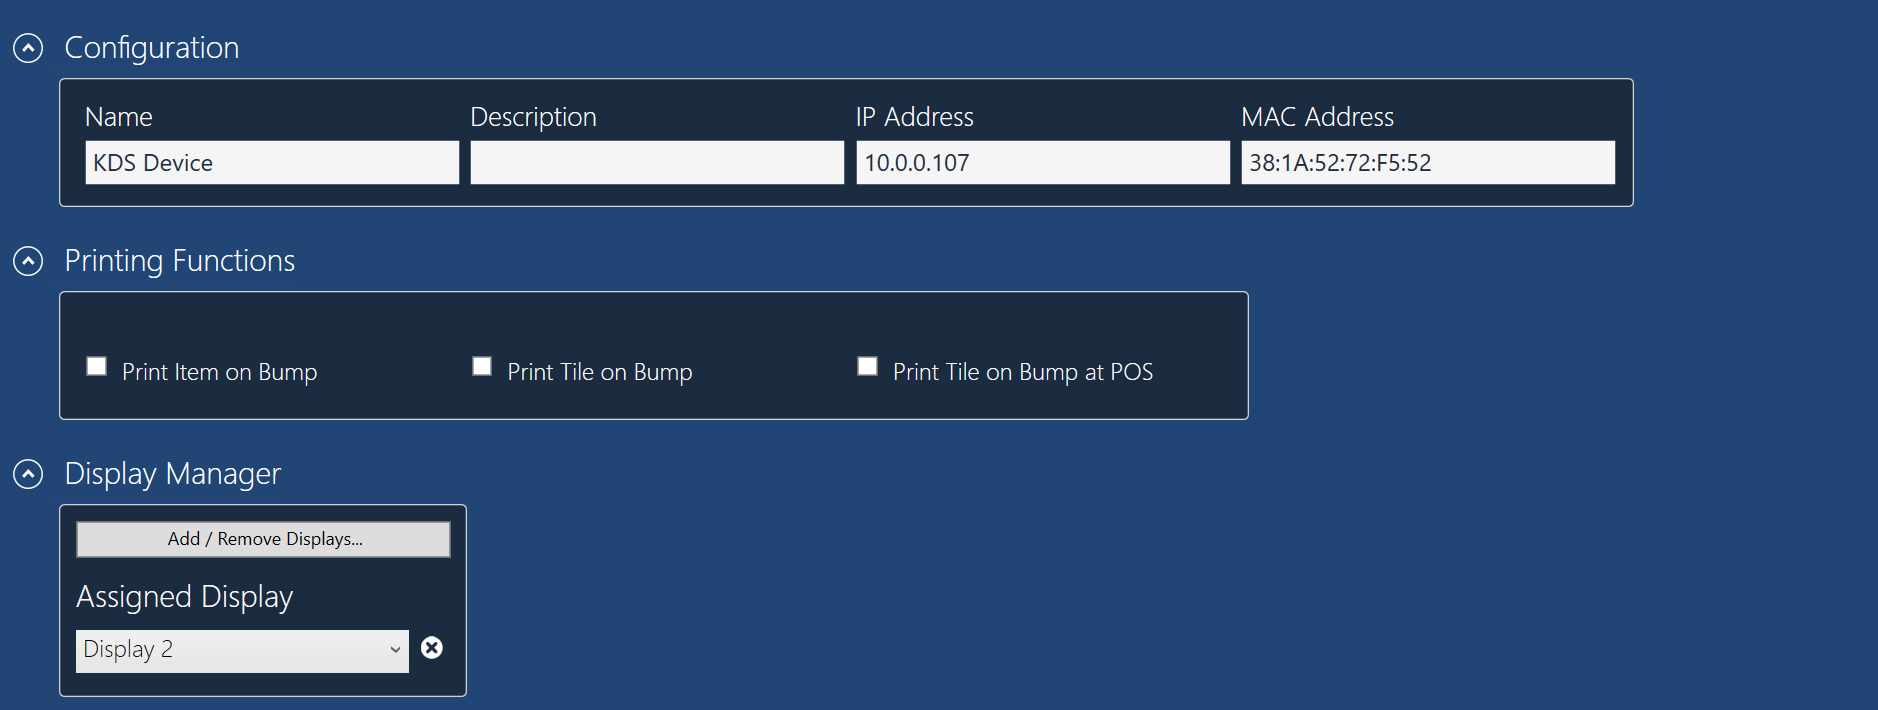
Configuration
Name: This is the name of the device.
Description: Enter a description, if desired, to remind you what this device is. Useful when you have multiple devices.
IP Address: This is the IP address of the printer or Expansion Module. For the printer, it will be visible on the status sheet that prints each time you turn it on while it is connected. For the Expansion Module, it will appear on the monitor when it is turned on while connected.
Mac Address: The Mac address is the unique serial number of the device. For the Printer, it will be visible on the status sheet that prints each time you turn it on while it is connected. For the Expansion Module, it will appear on the monitor when it is turned on while connected.
Make Sure “Attached To POS” Is Checked!
The Basic Information will populate when you configure the device with the IP address.
Printing Functions
Print Chit: Check this box if you want to print a chit when an order is placed.
Print Item on Bump: Check this box if you want to print an individual item when it is bumped (completed).
Print Tile on Bump: Check this box if you want to print a total Order Tile when it is bumped (completed).
Display Manager
Choose the display file desired for this device.
For instructions on how to customize display files, click here.
 Identify The Master
If you have only one printer on your network, the Configuration Utility automatically selects it as the master device. If you have more than one printer, you may need to select the correct one as the master. You cannot make a KDS Expansion Module the master device. If you do not have a printer selected at all, the KDS system will not function correctly.
The Master printer is identified when the Attached To POS box is checked.
For Single Screen Setup
The Attached To POS should be checked for the printer automatically.
Under Display Manager, select the monitor as the Assigned Display setting.
For Multi-screen Setup
Check the Attached To POS box for your main printer.
For any additional printers or Expansion Modules, select their corresponding monitors as the Assigned Display setting.
Save
When finished, click Apply KDS Settings on the top right corner of the screen.
Gut Check!
Are all of your printers and Expansion Modules added in the Devices tab?
Next
This is the end of the configuration process. Let’s head back to the overall KDS setup.
- Head back to the KDS Setup Guide to move to the next step in the overall KDS Setup.
- Or continue to the next step, Connecting Your KDS With Arryved, directly.
Related Articles
Epson KDS Configuration Utility Settings
What Is The Configuration Utility? The Epson KDS Configuration Utility will be downloaded and installed onto your PC. Using the utility, you can configure your KDS devices and customize the Order Tiles and display on your monitor(s). This article ...Epson KDS Configuration
Overview If purchased through Arryved, your KDS hardware will be initially configured by an Arryved Specialist based on the KDS Setup Questionnaire you received. If you need to modify your configuration or if your hardware was outsourced, the steps ...Install The Epson KDS Configuration Utility
What Is The Configuration Utility? The Epson KDS Configuration Utility will be downloaded and installed onto your PC. Using the utility, you can configure your KDS devices and customize the Order Tiles and display on your monitor(s). This article ...Epson KDS Hardware Checklist
Overview In this article, you will find a list of all the physical hardware you need for your KDS. Notice that some items are provided by Arryved and some items you will need to source on your own. The items labeled "optional" may be important, ...How To Customize Epson KDS Displays
What Is The KDS Display? The KDS display is the total of what you see on a KDS monitor. This is different from the display of an individual Order Tile. You can customize how the Order Tiles are arranged on the screen, what tile format to use, create ...