Arryved Service Settings Overview
What Are The Arryved Service Settings?
Arryved Service has its own adjustable settings to support your diverse business needs. From the Arryved Service settings, you’ll find,
Venue selection
Card Reader pairing
Barcode Scanner pairing
Printers (or KDS screens) selections
Offline Mode
Cash Drawer pairing
Troubleshooting tools
Arryved Support, network, and device information.
Prerequisites
It's likely some settings were adjusted already from when Arryved Service was set up for the first time on this device.
Some settings are only available with the HARDWARE Labor Role Permission.
Limitations
Tapping the Reset Service button in the settings restores the device back to its original default settings. Settings will need to be re-adjusted from scratch. Please only use this function if you’re advised to do so by an Arryved team member.
How It Works
Venue selection
Use the Venue button under the settings to change the Venue that this device is operating under.
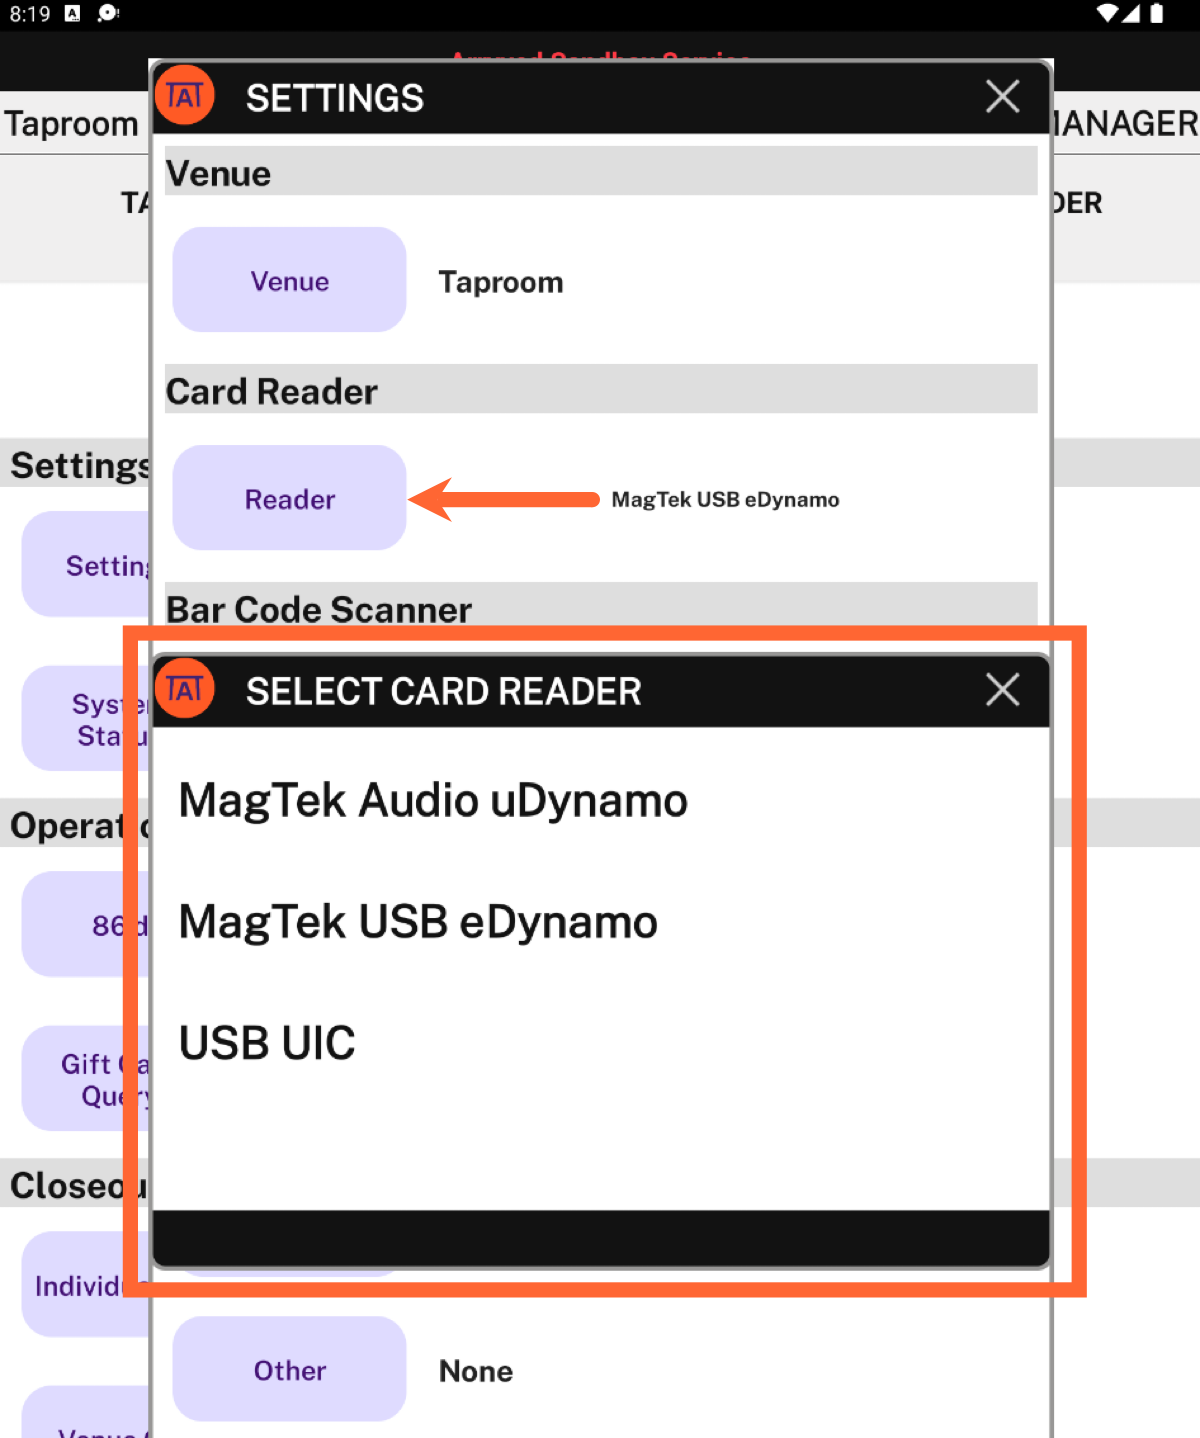
Card Reader
Tap the Reader button to pair a card reader to this device. From the list, readers are labeled by their brand + type and serial number. Find the serial number on the underside of your card reader.
Barcode Scanner
If you’re using a barcode scanner, tap Scanner to pair it to this device.

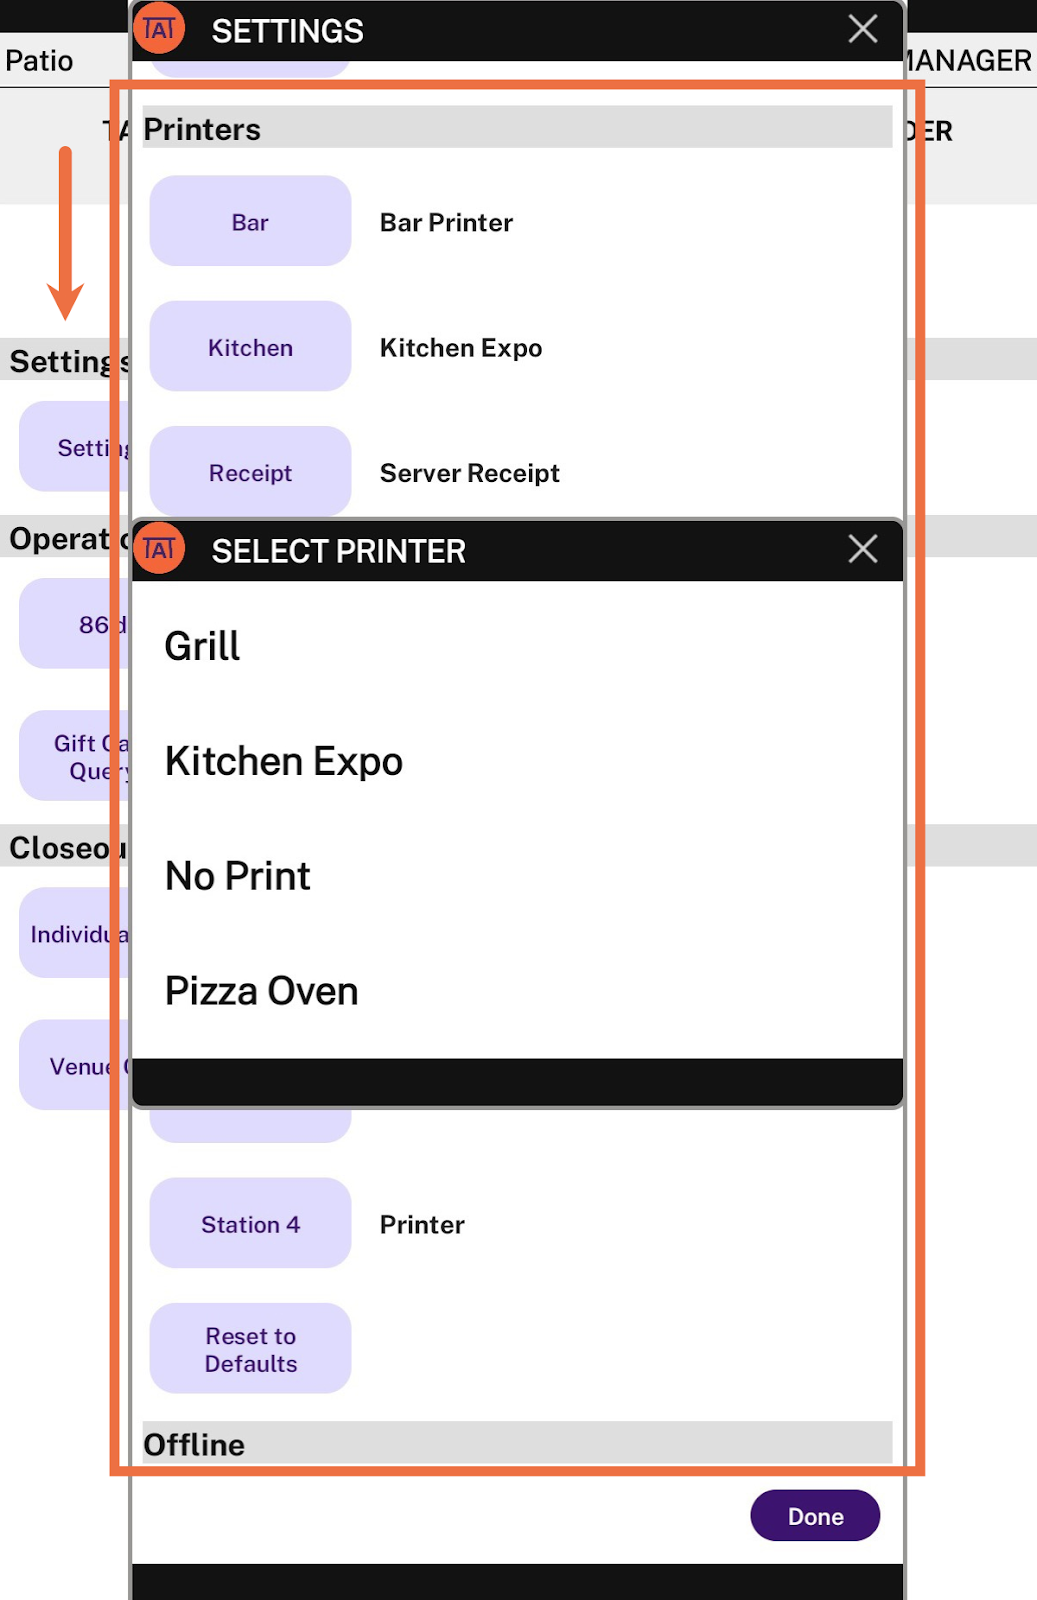
Printers (or KDS screens)
Here you can select a peripheral (printer or KDS screen) for each ticket type for this device. Any peripherals selected here only apply to orders sent from this device. You can tap Reset to Defaults for the peripheral choices to match your default settings that are configured in your Arryved Portal print matrix.
Offline Mode
Toggle Offline Mode on or off for this device here. When you’re back online, use the Sync button to sync the records created offline, across all devices.

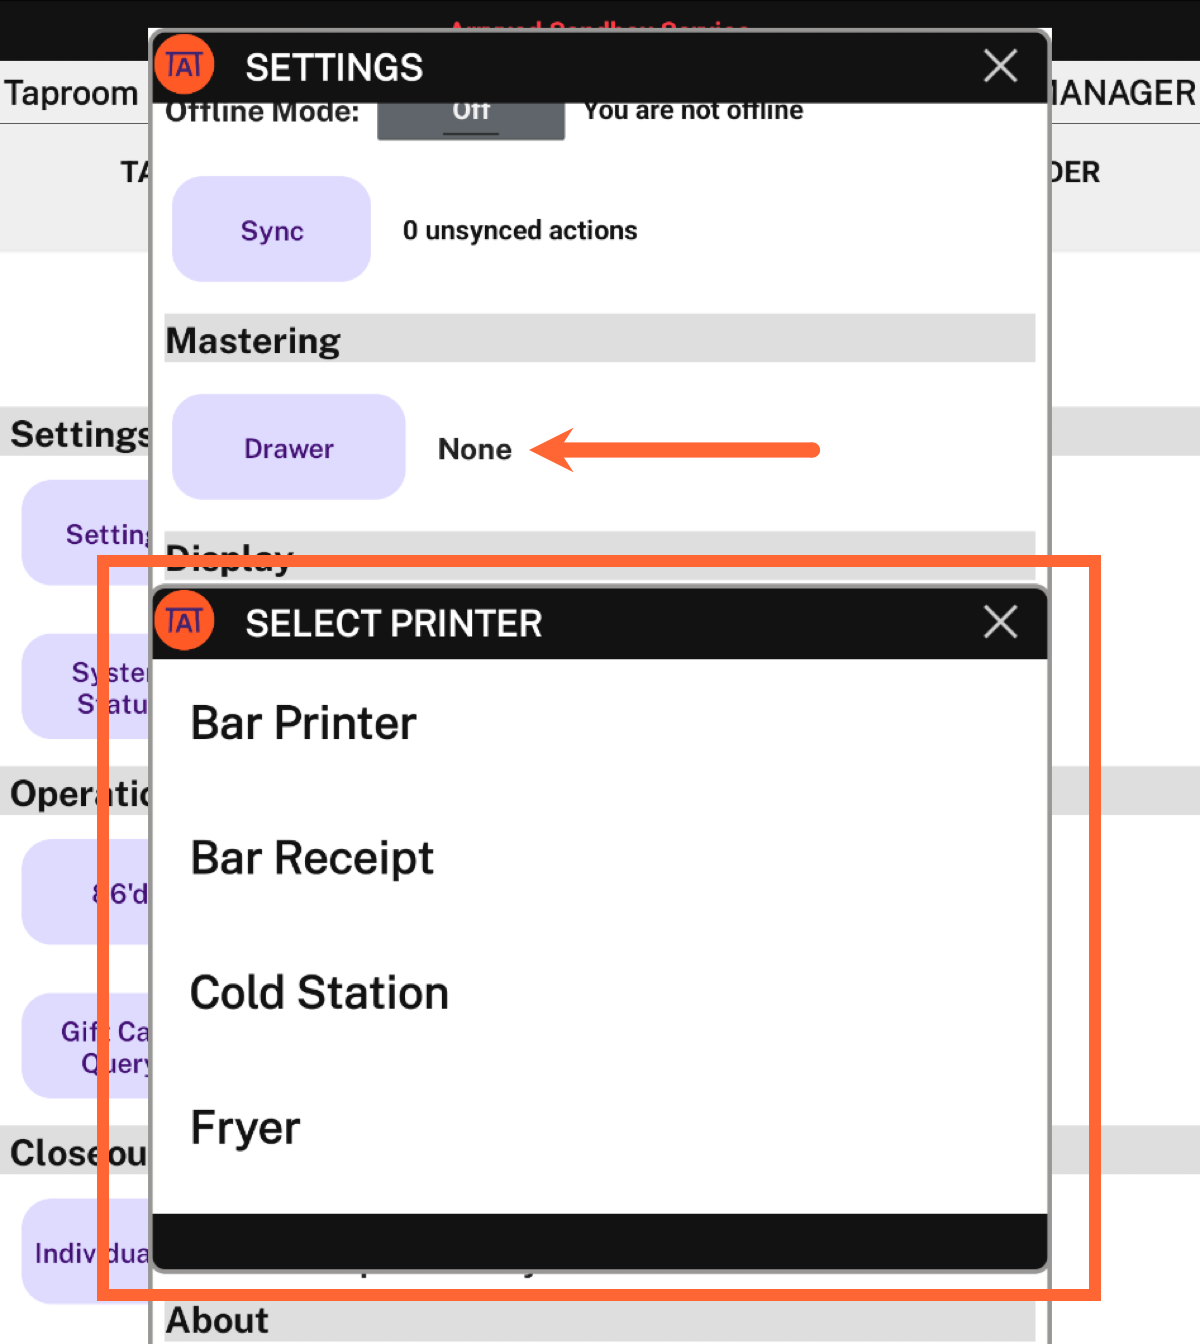
Mastering / Cash Drawer
Under the Mastering section, you can pair your cash drawer to this device.
Resetting Service
Please only use the Reset Service or Flush Tasks buttons if you’ve been advised to by an Arryved Support Specialist.
Read more about these buttons in Arryved Service Troubleshooting
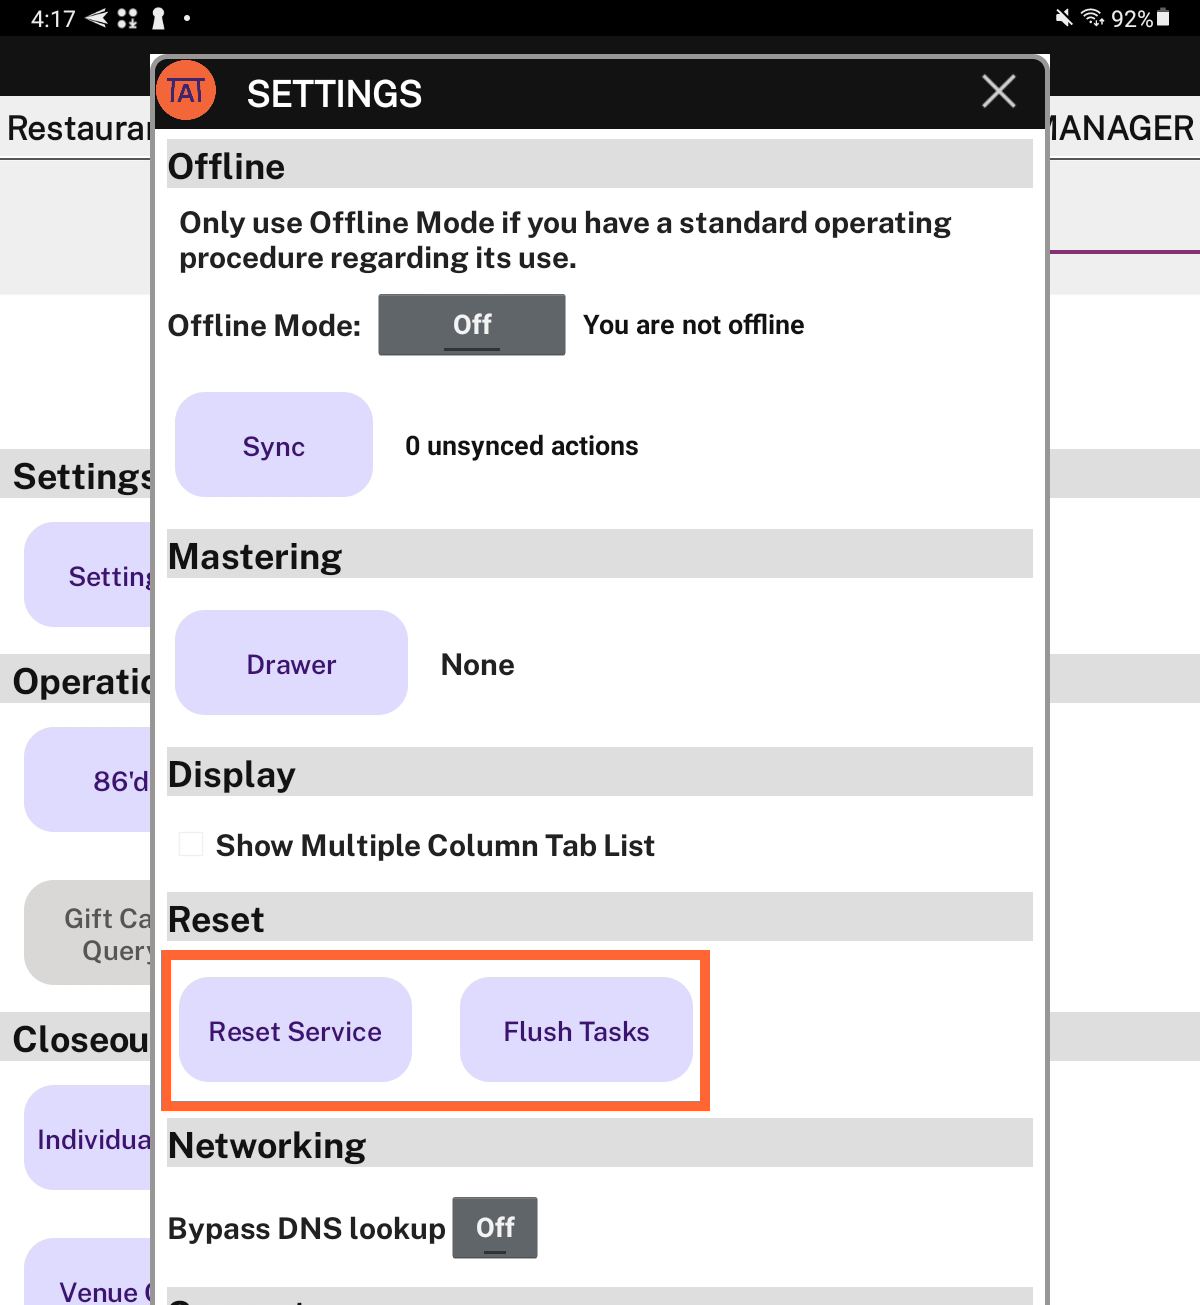
Bypass DNS Lookup
In the rare event that there's a DNS outage (it happens), you can bypass DNS lookup and continue to smoothly operate in Arryved Service! Please only use this function if you’ve been advised to do so by an Arryved team member.
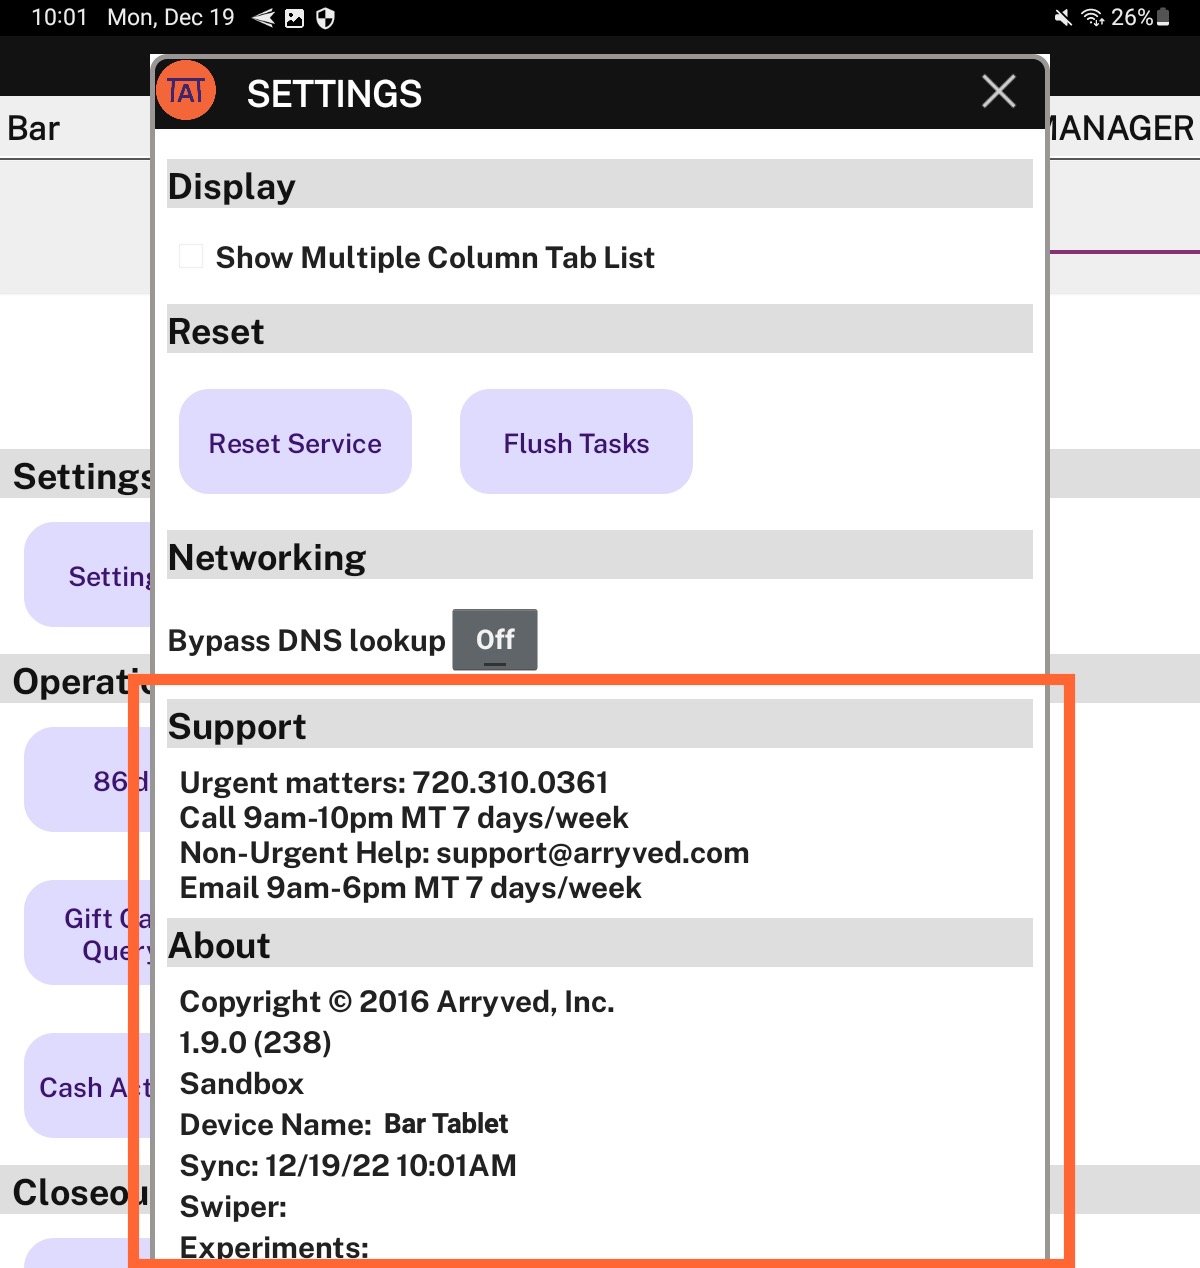
Arryved Support, Network, and Device information
Scroll to the bottom of the settings to find Arryved Support’s contact information as well as other information about your network and device.
Related Articles
Offline Mode Overview
What Is Offline Mode? Arryved’s wireless POS devices bring ease to your service flows, but what happens when you can’t connect to the wireless network? When the WiFi goes down or there is an outage that’s out of our control, the thought of putting a ...tDynamo Card Reader Troubleshooting
What Is tDynamo? The tDynamo is Arryved’s newest card reader that offers tap, dip, swipe, and digital wallets all in one! The tDynamo is exclusive with Arryved Pay, our new, end-to-end, payment solution with in-house payment processing. Use this ...tDynamo Card Reader Setup Guide
What Is tDynamo? The tDynamo is Arryved’s latest hardware that offers tap, dip, swipe, and digital wallets all in one card reader! The tDynamo is exclusive with Arryved Pay, our new, end-to-end payment solution with in-house payment processing. Use ...Cash Drawer Setup Guide
What Is A Cash Drawer? A Cash drawer is essentially a lock box for your cash. You can connect your cash drawer to your Arryved POS and receipt printer so it opens when cash is needed. This article shows you how to set up your cash drawer for the ...How To Exit Offline Mode And Sync Devices
What Is Offline Mode? Arryved’s wireless POS devices bring ease to your service flows, but what happens when you can’t connect to the wireless network? When the WiFI goes down or there is an outage that’s out of our control, the thought of putting a ...